
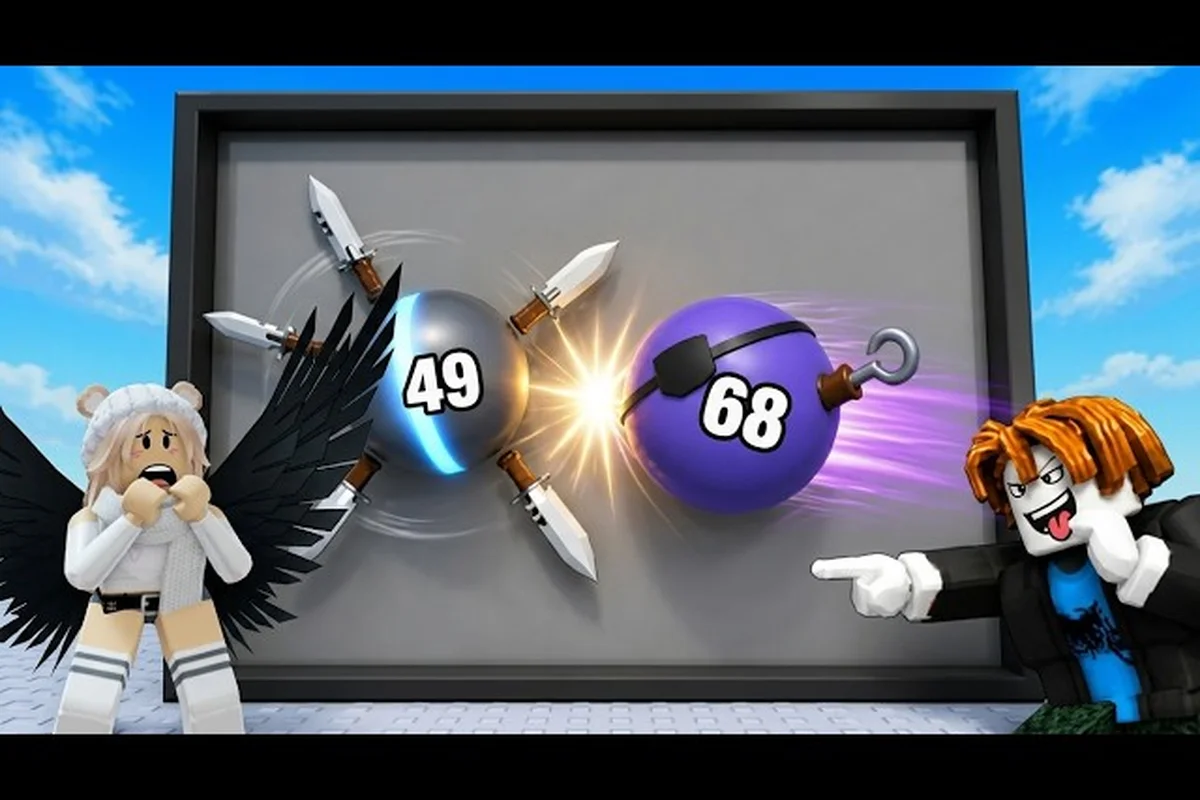
Getting better at Ball VS Ball is less about grinding hours and more about the small habits you build during every match. The arena throws you into a loop of picking, rerolling, fighting, and unlocking, and players who treat each round as a learning rep climb the ladder noticeably faster. This progression guide focuses on the decisions that actually move your win rate: reading the spawn, picking the right first ball, and turning coins into permanent upgrades before you chase Rare or Legendary drops.
According to the official Ball VS Ball game page on Roblox, the core loop is straightforward — enter the arena, fight other players, reroll your ball when the roll is bad, win battles to earn coins, and unlock new balls in the shop. Simple on paper, but the gap between a player who wins 30% of rounds and one who wins 55% usually comes down to early-game choices, ball-pick discipline, and how aggressively they spend coins. The rest of this article breaks down each of those habits.
Ball VS Ball Early Game Foundations
Your first twenty matches define the trajectory of your account, because every early win stacks coins that unlock better balls, and every early loss leaks coins that could have gone into a stronger loadout. Treat the early game as a structured learning phase rather than a chaotic warmup. The players who climb fastest are the ones who enter each match with a small checklist instead of rushing in blind.
Reading the Arena Before the First Roll
The arena in Ball VS Ball hands every player a random ball at the start of a round, and the temptation is to either fight immediately or reroll the second the spawn feels off. A better habit is to spend the first three seconds of every match reading the field: count the players still alive, note the dominant ball type in the lobby, and check whether the space around your spawn is open or cluttered. Those three data points tell you whether you should fight, bait, or reroll on the first contact.
| Arena Cue | What It Tells You | Best Response |
|---|---|---|
| 4+ players alive at spawn | High chaos, lots of mid-balls | Reroll once if your ball is mid-tier |
| 1-2 players near your corner | Likely 1v1 opening | Fight immediately with your first ball |
| Mostly Explosion or Flyer balls in lobby | Rush meta active | Reroll toward a Ball-family counter |
| Mostly Ball-family balls in lobby | Brawl meta active | Save reroll, fight on first contact |
That last row matters more than players expect. When the lobby is full of Ball-family balls, the Explosion and Flyer picks gain real value because they punish grouped brawls. Recognizing the lobby meta before you commit to a fight is one of the cheapest ways to start winning more rounds, and it costs nothing but attention.
First-Round Ball Picks: What to Roll Toward
Every ball in the game falls into one of three families — Ball, Explosion, or Flyer — and the official shop rotates stock across all three at Rare, Epic, and Legendary tiers. Early on, your rerolls should follow a simple rule: reroll away from the family that is most represented in the lobby, and reroll toward the family you have actually practiced with. New players often reroll based on the rarity color of the ball rather than the family matchup, which is why their rerolls feel expensive and unproductive.
| Family | Early Game Strength | When to Pick | Common Mistake |
|---|---|---|---|
| Ball | Reliable in straight 1v1s | Lobby mixed, no clear meta | Picking it when lobby is full of Ball-family |
| Explosion | Punishes grouped fights | 3+ enemies clustered at spawn | Using it in open 1v1s with no setup |
| Flyer | Strong kiting and chasing | Open arena, low clutter | Picking it in tight corners where mobility is wasted |
The first-round discipline is small but compounds. If you reroll twice per match on average and you play 20 matches a day, that is 40 rerolls where you are either gaining useful information or burning a free action. Players who consciously reroll toward a target family consistently report better coin income because they win the rounds where their ball actually fits the lobby.
The Coin Flow in Your First Twenty Matches
Coins are the single most important resource in early Ball VS Ball, and the way you spend them in your first hour shapes how quickly you unlock Rare and Epic balls. According to the official loop, you earn coins by winning battles, and the shop is where you cash them in for new permanent balls. New players tend to either hoard coins waiting for a Legendary drop or spend them impulsively on the first shiny ball they see. Both habits stall progression.
| Spending Habit | Effect on Progression | Better Alternative |
|---|---|---|
| Hoarding for Legendary | Slow unlock curve, weak loadout for 30+ matches | Buy 2-3 Rare balls early for a balanced roster |
| Impulse buying newest shop ball | Roster full of mismatched balls | Pick balls that fill a missing family slot |
| Saving rerolls for "perfect" rounds | Low win rate, low coin income | Reroll 1-2 times per round to learn matchups |
A practical target for your first twenty matches is to leave the session with at least one usable ball from each of the three families. That simple goal forces you to spend coins with intent, gives you options in every lobby, and prevents the "all-Ball roster" trap that locks you out of Explosion and Flyer matchups. Players who follow this habit report noticeably faster progression past the 50-match mark, because their shop options scale with their coin income instead of fighting against it.
If you want a deeper breakdown of the coin economy and which shop rotations are worth chasing, the Ball VS Ball coin farming guide walks through the math in detail.
Ball VS Ball Best Start: Match-Day Routine
A strong start to a play session is more about routine than raw skill, because consistency is what turns a 40% win rate into a 55% win rate over a week. Players who treat Ball VS Ball like a structured practice — warmup matches, focused matches, cooldown matches — get more out of every hour than players who queue blind for two hours and wonder why their win rate flatlines.
Warmup Phase: Three Rounds to Recalibrate
The first three rounds of any session are warmup, not a real attempt at climbing. Your nervous system needs a few minutes to calibrate reaction time, and your brain needs a few rounds to recall which family counters which. Treat these rounds as data collection: note which balls you gravitate toward, which rerolls felt smart, and which fights you lost for mechanical reasons versus decision reasons.
| Warmup Round | Goal | What to Track |
|---|---|---|
| Round 1 | Re-learn controls, no reroll anxiety | Which ball type feels comfortable |
| Round 2 | Test one aggressive play | Whether aggression won or lost the round |
| Round 3 | Test one defensive play | Whether patience or pressure fits your style |
Most players skip this phase and immediately start playing ranked or serious rounds while still cold. The cost of skipping warmup is not dramatic, but it adds up: a cold start produces a handful of early losses that set the tone for the rest of the session, and those losses cost coins that could have been wins. Three warmup rounds cost you about two minutes and usually buy back five to ten extra wins over the rest of the session.
Focused Phase: The Three-Habit Loop
Once you are warmed up, the next phase of the session is where real improvement happens. The three-habit loop is a simple framework: pick one habit, practice it for five matches, then evaluate. The habit might be "reroll toward the family that counters the lobby," or "save my first aggressive move for the second contact instead of the first," or "never spend coins without filling a roster gap." Pick one, not three, and run it for a focused block.
| Habit Block | Sample Habit | Evaluation Metric |
|---|---|---|
| Block 1 (matches 4-8) | Reroll discipline | Did rerolls follow the family-counter rule? |
| Block 2 (matches 9-13) | Coin spending | Did every purchase fill a roster gap? |
| Block 3 (matches 14-18) | Early-fight decision | Did I fight, bait, or reroll based on the arena cue? |
The key is to evaluate honestly. If your reroll discipline broke down in matches 6 and 7, that is useful data, not a failure. Players who track even rough notes after each block consistently improve faster than players who play on autopilot, because they catch the patterns that autopilot hides. The three-habit loop is also a natural place to layer in cross-skill practice: if you are trying to get better at Ball VS Ball at the same time as learning how to win specific 1v1 setups, you can rotate those into the same block structure.
Cooldown Phase: Two Rounds to Reset
The last two rounds of a session are cooldown, and they serve a different purpose than the warmup. Warmup is about preparing your body and brain for the session; cooldown is about banking one or two clean wins before you log off, because the last memory of a session shapes how confident you feel returning the next day. Players who end on a tilted loss often take a day off, which slows progression more than any in-game loss could.
| Cooldown Goal | Best Approach | Avoid |
|---|---|---|
| One clean win | Pick your strongest ball, play defensively | Forcing a hard fight with a weak ball |
| Positive close | Stick to one family, skip risky rerolls | Spending coins impulsively in the last 5 minutes |
| Mental reset | Note one thing you learned today | Replaying lost rounds in your head |
The cooldown is also a good moment to check your coin balance and decide whether to enter the shop or save your next session's coins. Impulse spending at the end of a session is one of the most common progression mistakes, because tired players buy balls they would not have picked at the start of the day. If you find yourself staring at the shop after a long session, close the game and revisit the rotation tomorrow — the shop stock will still be there.
Ball VS Ball Progression Guide: Building a Roster That Scales
Progression in Ball VS Ball is mostly a roster problem, not a skill problem. A player with a balanced roster of three strong balls will outperform a player with one maxed ball in most lobbies, because matchup diversity is what lets you adapt to a changing meta. The progression path below assumes you are starting from zero or near-zero, and it scales the same way whether you play thirty minutes a day or three hours a day.
The Three-Family Roster Target
The single most useful progression milestone is owning at least one strong ball from each of the three families: Ball, Explosion, and Flyer. Once you have that baseline, you can start chasing family-specific upgrades rather than spreading coins thin. Most players hit this milestone within the first 40-60 matches if they spend coins with intent, and it is the point at which match-to-match decision-making becomes much more interesting.
| Milestone | Roster Goal | Coin Spend Priority | Match Win Rate Target |
|---|---|---|---|
| First 20 matches | 1 usable Ball-family ball | Buy 1 Rare Ball | 40-45% |
| Matches 21-40 | Add 1 Explosion-family ball | Buy 1 Rare Explosion | 45-50% |
| Matches 41-60 | Add 1 Flyer-family ball | Buy 1 Rare Flyer | 50-55% |
| Matches 60+ | Chase Epic across all 3 families | Replace weakest Rare first | 55%+ |
Notice the win rate targets — they are not arbitrary. Crossing 50% means your coin income is positive on average, which compounds into faster unlocks. Crossing 55% means your coin income is significantly positive, which is when Epic and Legendary balls start to feel reachable instead of distant. Players who plateau below 50% usually have a roster imbalance problem rather than a mechanics problem, which is why the three-family target matters so much.
When to Chase Rare, Epic, and Legendary
The shop rotates stock across all three tiers, and the temptation to skip Rare balls and go straight for Epic or Legendary is strong. But progression data from community play suggests that a balanced Rare roster outperforms a single Epic ball in most lobbies, because Epic is a 30% stat boost while roster coverage is a 200% flexibility boost. The right rule of thumb is to fill Rare across all three families first, then start replacing your weakest Rare with an Epic, and only chase Legendary when you already have a strong Epic anchor in that family.
| Tier | When to Chase | Common Mistake |
|---|---|---|
| Rare | First 60 matches, fill all 3 families | Skipping Rare to chase Epic |
| Epic | After Rare roster is complete | Replacing a strong Rare with a weak Epic |
| Legendary | After Epic anchor in that family | Buying Legendary before Epic is established |
This is also where the coin economy starts to matter more than the reroll economy. Rerolls are a per-match resource that you can use freely, but coins are a multi-match resource that you should plan around. If you are serious about climbing, the Ball VS Ball new player guide covers the same progression curve in more detail and pairs well with the coin guide linked earlier.
Ball VS Ball Winning Strategy: Mid-Match Decisions
The middle of a match is where most rounds are actually won or lost, because the spawn phase is over, the reroll phase is closing, and the surviving players are sorting into the final engagements. Players who treat mid-match as a separate decision phase — rather than a continuation of the opening — start winning more clutch rounds, because they slow down at the exact moment most players speed up.
The Three-Second Pause Before Engagement
The single highest-leverage habit in Ball VS Ball is a three-second pause before each mid-match engagement. During those three seconds, you scan for three things: how many enemies are near the engagement zone, whether any of them are using a ball that hard-counters yours, and whether there is a better path that avoids the fight entirely. Most rounds are lost in the half-second before a fight starts, when a player commits to a ball-vs-ball trade they could have avoided.
| Decision | What to Check | Best Outcome |
|---|---|---|
| Engage | Enemy count, ball matchup, escape route | Win the trade cleanly |
| Bait | Enemy aggression, your mobility | Force enemy to overcommit, then counter |
| Reroll | Ball hard-countered, no escape | Reset ball, regroup, re-enter |
The pause costs almost nothing in a single round, but it compounds across a session. A player who pauses for three seconds before every mid-match engagement will lose fewer coin-farming rounds, will save rerolls for genuinely bad matchups, and will enter the late-game portion of each match with more options. The pause also reduces tilt, because it forces a moment of decision between the chaos of the spawn phase and the high-pressure final engagements.
Reading the Lobby After the First Three Players Fall
Once three or four players are eliminated, the meta of the lobby shifts dramatically, and most players do not adjust. The player who notices that the remaining field is now dominated by Explosion balls should immediately consider switching to a Ball-family pick, because their original game plan is no longer relevant. This is also the moment when the Flyer family shines, because open arenas with two or three surviving players reward kiting and chasing more than brawling.
| Lobby State | Best Family | Reasoning |
|---|---|---|
| 4+ Ball-family players left | Explosion | Group punish |
| 3+ Explosion-family players left | Ball | Reliable 1v1 trades |
| 2+ Flyer-family players left | Ball or Explosion | Both punish aerial kiting |
| 1-2 players total left | Whatever you practiced | Matchup skill beats meta read |
The mid-match read is also the natural place to integrate your reroll discipline. If you are using a Ball-family ball and three Explosion players are still alive, the correct response is almost always to reroll toward a Flyer or to commit to playing defensive until the field opens up. Players who reroll on instinct rather than on data tend to spend more rerolls and gain less from them, which is why the data-driven reroll habit is one of the cleanest ways to improve.
If you want a deeper breakdown of how to convert these mid-match reads into wins in the final 1v1 or last-one-standing scenarios, the Ball VS Ball winning tips guide covers the clutch phase in more detail.
Ball VS Ball Match Habits: The Long-Term Improvement Loop
Improvement in Ball VS Ball follows a predictable curve: new players gain win rate quickly in the first twenty matches, plateau between matches twenty and sixty, and then start climbing again once their roster and habits mature. The plateau is the most dangerous phase, because it is when most players quit or assume the game is pay-to-win. In reality, the plateau is a sign that you have learned the basics and now need to invest in habits rather than mechanics.
Weekly Session Structure
A weekly session structure helps you avoid the plateau by giving each play session a purpose. The simplest structure is three focused sessions per week, each about thirty to forty-five minutes, with a clear goal. One session might focus on reroll discipline, another on coin spending, and a third on mid-match reads. The goal is not to grind matches, it is to install one habit per session.
| Session | Focus | Win Rate Goal |
|---|---|---|
| Session 1 | Reroll discipline | Hit 50%+ win rate with disciplined rerolls |
| Session 2 | Coin spending | End session with full Rare roster across 3 families |
| Session 3 | Mid-match reads | Win at least 2 clutch rounds from a paused decision |
Players who follow a weekly structure consistently report breaking through the 50% plateau within two to three weeks, which is when Epic and Legendary balls start to feel within reach. The structure also makes the game more enjoyable, because every session has a purpose beyond "play until I lose." If you are a player who tends to play in long binges rather than focused sessions, this is the single biggest lever you can pull to start improving faster.
Tracking the Right Metrics
Tracking every stat in Ball VS Ball is overkill, but tracking two or three metrics per session gives you a clear picture of whether you are improving. The most useful metrics are win rate, average rerolls per match, and coin balance at the end of the session. Win rate tells you whether your habits are translating into wins. Average rerolls tells you whether your reroll discipline is improving. Coin balance tells you whether your spending is supporting your roster goals.
| Metric | What It Measures | Healthy Range |
|---|---|---|
| Win rate | Skill + decision quality | 50%+ after 60 matches |
| Avg rerolls per match | Reroll discipline | 1-2 rerolls, not 3+ |
| Coin balance end of session | Spending discipline | Positive or stable, not draining |
Players who track even rough numbers for a week usually spot at least one habit that is holding them back. Common discoveries include rerolling too aggressively (3+ per match), spending coins on duplicate family slots, or playing past the point of fatigue and losing more rounds than usual. None of these are dramatic problems, but they are exactly the kind of small leaks that the habit loop is designed to fix.
Long-Term Goals: From Roster to Mastery
Once your roster is solid across all three families and your win rate is consistently above 55%, the long-term goal shifts from progression to mastery. Mastery in Ball VS Ball looks like reading lobbies faster, winning clutch rounds through decision quality rather than mechanics, and being the player who tilts less because every match is a learning rep regardless of the outcome. This is also the stage where joining the ATYS 3 developer group on Roblox becomes valuable, because the group is the official free-rewards path mentioned in the game description and a good way to stay connected to patch news and community events.
Mastery also means knowing when to stop a session. Players who can identify a tilt streak early — usually two losses in a row where the decision quality dropped — and take a five-minute break consistently end the season with a higher win rate than players who push through the tilt. The five-minute break is not glamorous, but it is one of the highest-leverage habits in any competitive game, and Ball VS Ball is no different.
Frequently Asked Questions
What is the fastest way to get better at Ball VS Ball as a brand new player?
Focus on three habits: reroll toward the family that counters the lobby, spend coins to fill one ball per family before chasing upgrades, and pause for three seconds before every mid-match engagement. Those three habits alone will lift your win rate above 50% within forty matches, which compounds into faster coin income and a stronger roster.
How do I win more Ball VS Ball matches when I keep losing the first fight?
Stop fighting the first contact and start baiting instead. Most early losses come from accepting a 1v1 your ball was not built for. If you spawn next to two or three enemies, back off for two seconds, let them commit to each other, and then pick the survivor. This single habit converts losing spawns into coin-farming wins.
What is the best ball family to start with in Ball VS Ball?
The Ball family is the safest early pick because it performs reliably in straight 1v1 trades and does not require arena setup. Once you have a Rare Ball-family ball, your second purchase should be a Rare from whichever family the lobby meta rewards most often — usually Explosion for grouped spawns or Flyer for open arenas.
How many matches does it take to progress past the early plateau?
Most players hit the 50% win rate plateau between matches forty and sixty. Breaking through usually requires a roster with at least one ball from each of the three families and at least one focused habit block per session. Community reports suggest two to three weeks of structured sessions is enough to cross 55% consistently.
Should I reroll my ball in Ball VS Ball if my first pick is Rare?
Not automatically. Rarity matters less than family matchup, especially in the first thirty matches. If your Rare ball fits the lobby meta and you have practiced with that family, keep it. Reroll only when the family is hard-countered or when the lobby is dominated by a single family you cannot beat with your current pick.